Learn how to remove a broken guide and then correctly replace it to restore overall performance.
The Basics of Guides and Finding Measurements
Leading the line down the rod and out of the tip-top, guides are one of the most essential components on a fishing rod. Each guides is as—if not more—important than the last in reducing the friction on the fishing line and guiding the line out effortlessly.
Whether it’s a double foot, single foot, or trolling guide, all are equally valuable to the overall performance of the fishing rod and without one guide, the remaining rod’s performance is severely reduced. Removing and replacing broken guides is not only possible, but when done with the correct technique, it is also rather simple.
Begin the replacement process by measuring your old guide in order to find your new guide. This is easy as long as you have the measurements needed to find the right replacement.
Guides are measured in millimeters and determined according to the outside diameter (OD) of the insert ring, or in cases where the casualty is the insert ring, the inside diameter (ID) of the guide frame can be used as a substitute since both translate to the same measurement.
Order your new Casting Guide here!
A common rod failure in fishing, damaged guides are often the result of being used as a hook keeper, stepped on, or bashed against a hard surface. In some cases, the guide frame will remain intact, but the insert ring will end up cracked, chipped, or missing. Never continue fishing with an impaired insert ring because it will shred your fishing line and eventually, sever the line completely.

Regardless, each scenario will require a replacement guide and the process begins by first removing that damaged guide. Prepare your work station for removing this guide by setting aside a razor blade, a small flame, a pair of pliers, and a china marker.
5 Steps for Removing Rod Guides
Using the following steps, you can successfully remove any broken guide from your fishing rod.
1. Apply Gentle Heat

First, using a small flame, such as a lighter, candle, or alcohol burner, quickly yet carefully whisk the flame back and forth over the epoxy on top of the damaged guide’s foot. This gentle heat will loosen up the epoxy’s bond allowing the razor blade to cut through the layer of finish like butter.
2. Cut Through Finish

Once the bond has been weakened by the gentle heat, take a razor blade and cut through the finish directly on top of the guide foot. Since the majority of rod blank materials can be easily damaged by a razor blade and the combination of thread and epoxy is just millimeters thick, cautiously cutting directly over the guide foot will help avoid tarnishing the rod blank itself.

3. Clear Any Excess

Now that the guide wrap is cut, there may be some leftover epoxy and thread in the guide’s previous location. To remove the residual material, use your fingers or pliers to peel the finish back then off of the rod blank. Be sure to remove the largest chunks of finish because they will complicate the installation of the replacement guide.

4. Remove The Damaged Guide

Next, the guide should just fall off after the razor blade severs the finish over the guide foot, but if the guide remains, take the pliers and pull that broken guide straight off the blank. It is important to pull the guide straight up and away from the blank rather than at an angle, which could cause the sharp guide foot to drag over the rod blank.

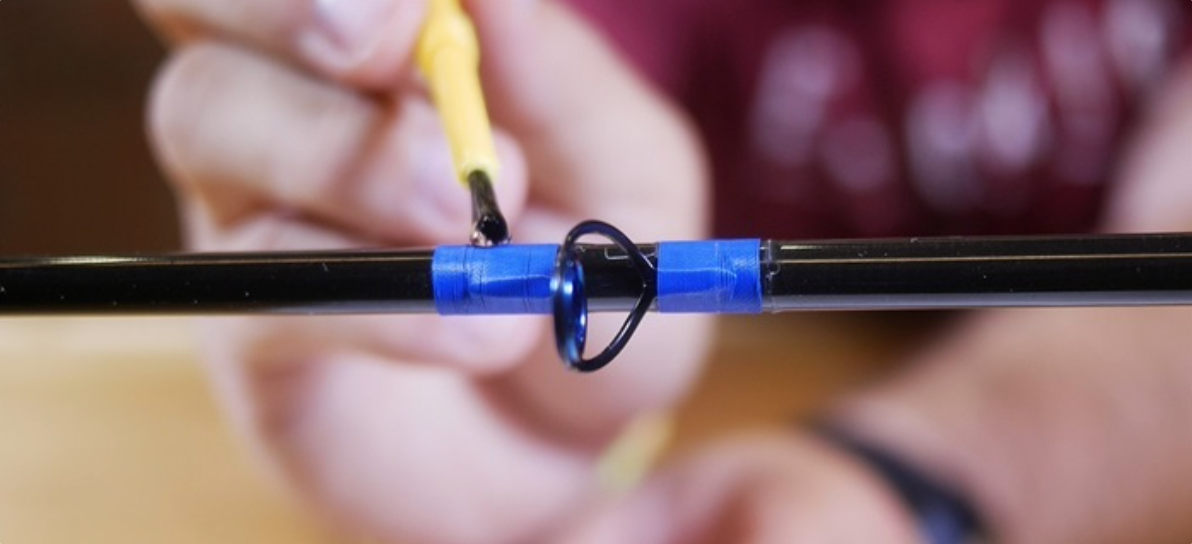
5. Make Your Mark
![]()
Finally, with the broken guide and leftover finish removed, use the china marker to put a dash where the replacement guide will attach. Typically, the previous guide will leave a foot print making it easy to line up the new guide however, that might not always be the case so make a mark with your china marker just to be safe.
Instructions for Installing Rod Guides
Sure fishing with a rod when it’s missing a guide won’t kill you, it certainly isn’t recommended. Considering how many line complications are possible in the space between the remaining guides, avoid cutting any corners to get back out on the water and return only when you have a fixed fishing rod you can cast with confidence.
With that said, the process for replacing a missing guide is straightforward and relatively quick. Start by gathering the tools, you will need the following: a small file, some light sand paper, a fresh razor blade, a spool of thread, a two-part epoxy mixture, a rod dryer, and a burnishing tool. Now with these nearby, you are ready to begin replacing the guide.
Use the following steps to replace any broken guides along your fishing rod.
1. Guide Preparation
After you pick up your new Casting Guide, start preparing the guide for installation.
Prepping your new guide is a must before it comes to time to attach it permanently. Properly prepping the new guide by grinding down the guide foot with a small file is important to the wrapping process. Take the time to file down the guide foot to a point before attaching it to the blank. This ensures a smooth transition once you start wrapping thread from the blank up onto the guide foot.
Once the point is complete, run the bottom of the guide foot over your finger nail. Finger nails mimic the surface of a rod blank so this test will determine if the bottom needs to be sanded. If it scratches your nail, it will scratch your rod blank. A simple fix, just take some light sand paper and buff out any burrs or points created underneath the guide foot.
A minor task to save a major headache, filing down the guide foot and sanding down the bottom of the foot will help you wrap the guide securely while avoiding any scratches your rod blank.
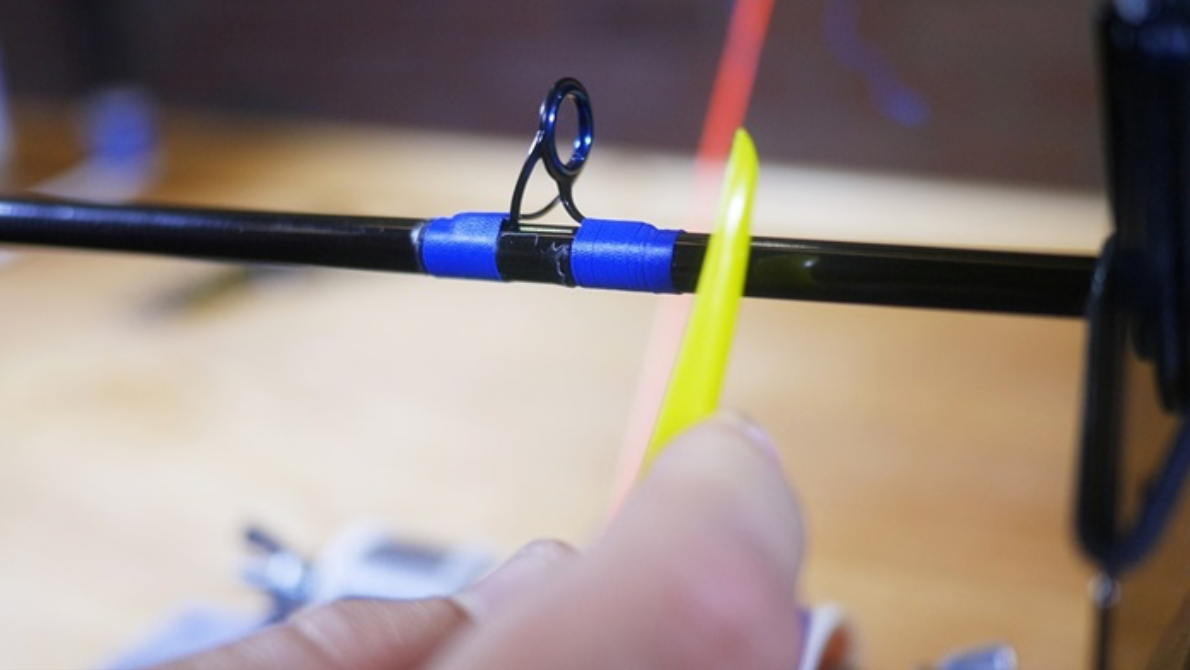
2. Double Check Guide Alignment and Spacing
Since the new guide has been prepped to avoid damaging the blank, place it on the mark or in the foot print of the previous guide. Then, apply a few rotations of masking tape or guide tubing to hold it in place.

This makeshift attachment allows you to double check your guide alignment and spacing.
Whether eye-balling these guide tests or using the always accurate CRB Spine Finder and Deflection System, what is most important is that you double check the guide alignment and spacing before permanently attaching the replacement guide. Once you are satisfied with the replacement guide’s alignment and spacing, move forward to the wrapping process.
3. Wrap Your Guide

Step 1
Beginning about 1/4 inch from the guide, Spool up your ProWrap Thread and begin wrapping from left to right. Start the thread wrap by wrapping around the rod blank a single time. Next carefully place your finger on the blank where the two threads meet and slowly rotate the rod while simultaneously crossing the running thread over the tag end.
Essentially, you are cross-stitching an X pattern, which will in turn lock the thread in place.
Step 2
Execute roughly eight wraps then stop and trim the remaining length of the tag end off as close to the wrap as possible. Continue wrapping, but keep monitoring each wrap so that they are tightly seated next to the previous wrap.
Step 3
Be careful while wrapping the transition from rod blank up onto the guide foot. This is a common place to make the mistake of allowing the threads to sit on top of each other rather than tightly next to each other.
Step 4
When you get about 1/8 inch from the end of your wrap, take a small piece of thread and fold it over into a simple loop. Then, slide the loop under the running thread—the loop should go in the same direction you are wrapping—making sure it’s tight and secure to your wrap. Continue wrapping over the loop, about eight to ten more times.
Step 5
At this point, place one finger on the top of the wrap and use your free hand to cut the running thread from the spool. Then just grab the tag end you just created and slip it through the loop.
Step 6
Gently pull the loop back through the wraps until both the loop and the tag end of your thread emerge from under the wraps.
Step 7
Once the loop and tag end emerge, lay the razor blade flat against your wraps with the blade facing where the tag end comes out from under your wraps. Take the tag end and pull it over the razor blade, cutting the tag end flush to your wraps. Never use the razor blade like a saw because the back and forth motion will fray the thread potentially damaging the strength of the wrap.
Steps 1 through 7 will wrap a single foot guide, but simply repeat the process if you are wrapping a guide with a double foot.
Step 8
To help keep the wraps tight, use the burnishing tool to fix any mistakes and cut down any extra space between wraps.

Make sure you have your rod guides lined up perfectly. The eye test is really the best way to do this. Just hold your rod up to eye level and look down the rod blank to make sure the centers of each guide match up.
4. Apply Epoxy Finish
Now that the guide is wrapped and you are satisfied with how it looks, it’s time to lay the epoxy finish over the guide wrap. We suggest a two-part epoxy with a resin and a hardener that mix together to give your finished rod a clean, sleek profile.


Make sure to keep the brush steady on the ends of the guide wrap in order to create a smooth, straight edge. With the epoxy finish on the new guide wrap, keep your fishing rod in a rod dryer and leave it rotating for the suggested curing time.
Use an alcohol burner to flame finish the epoxied wrap and release any remaining air bubbles.

5. Return to Fishing
After the curing process is over, the fishing fun can continue. Return to the water with peace of mind knowing that you replaced the broken guide and that you can keep casting with confidence.

Remember, breaking a guide off your rod is not the end and rather, use this advice to get back on the water with a fishing rod you know you can trust!