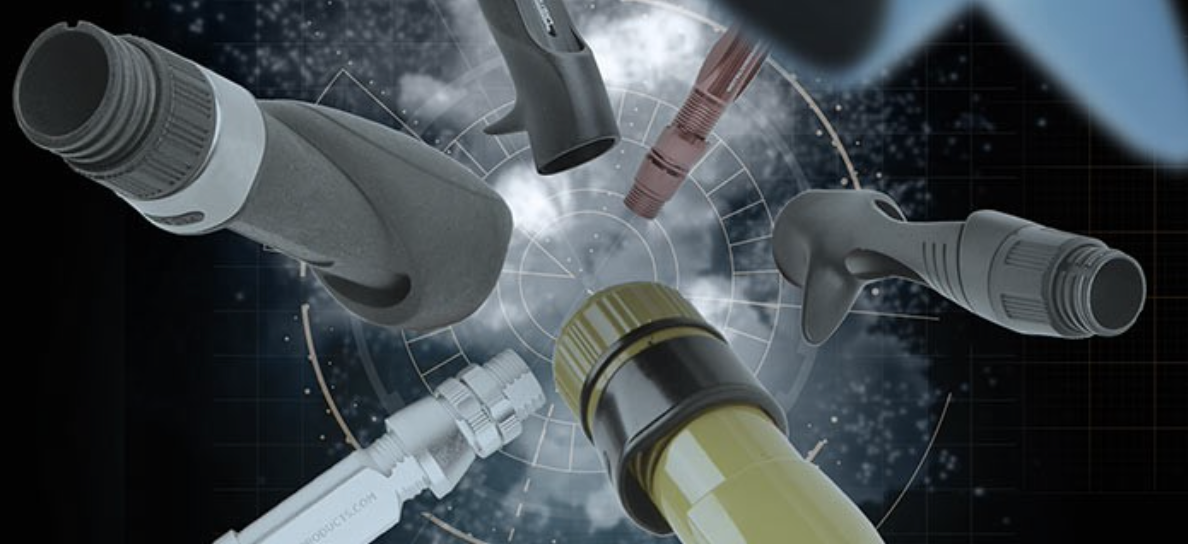
Don’t overlook the security of your reel, or the comfort of your handle. Learn all about Mud Hole’s vast variety of reel seats to find the perfect fit for your fishing rod.
Rod Building Reel Seats – Many Styles, One Job
When it comes to reel seats, there are many styles and sizes—yet all share one purpose—securing the reel to the rod.
With such an important job and so many options to choose from, we’re outlining everything you need to know.
Let’s get started…
The Basic Parts of a Reel Seat
- Body – main structure often made of graphite or aluminum
- Hood – fits over reel foot for optimal stability and security
- Locking Nut – tightens or loosens hood’s position over the reel foot
- Barrel Threads – channel for locking nut to screw up or down
- Trigger – ergonomic structure underneath casting seats for increased control
How to Size a Reel Seat
Although all reel seats share the same purpose, there are some boxes to check off to ensure you have made the best selection.
For instance, the casting reel seat you choose for a saltwater rod will have similar features to that of a freshwater casting seat, such as the body style, the trigger, and the locking hood. The main difference would be that the saltwater seat would be a larger size in order accommodate for larger reels and fasten their reel firmly to the rod.
Choosing the size of your reel seat depends on the two main factors: 1) the inside diameter (I.D.) of the reel seat, and 2) the outside diameter (O.D.) of the rod blank.
TIP: Use Digital Calipers to measure these desired diameters in seconds!
You should also factor in the size of the reel, but if you shop by fishing application, this aspect is generally accounted for in each categories inventory. In other words, freshwater seats are generally smaller and offered in a size 16 or size 17, while saltwater seats will overlap some, but most will run into larger sizes from 18 to 24.
Inshore rods will split the two and often use sizes 16, 17, and 18, whereas larger seats up in the 20s are reserved for hefty rods heading offshore to fight pelagic species or wrestle fish up from down deep.
Now those sizes are more for traditional spinning or casting style builds. There are also heavy duty reel seats for offshore applications, like bottom fishing, trolling, and more, that will require these beefed up reel seats to be built into an aluminum butt.
These saltwater applications require stouter rods and the necessary aluminum butt/reel seat combos are built tough for a reason. When the task at hand is securing large, expensive reels to rods that crank in massive fish with little respect for brand names—you want a reel seat that’s ready to rock.
Sizing for aluminum butts is determined by the O.D. of the butt of the blank, the I.D. of the aluminum butt, and the rod class.
Plus, the anodization of these aluminum butts not only protects from the corrosive effects of the ocean, it produces a sleek design that helps transfer rods in and out of gunnels, or fighting belts with ease.
Remember—despite the benefits of a good looking rod—building your own custom rod is also an easy way to ensure each component operates at peak performance against the trophy fish that definitely demand it.
For fly reel seats, sizing also comes down to the fly rod blank’s O.D. and the I.D. of the reel seat. Sizes aren’t necessarily marked by rod weight, but rather there will be a range of rod weights to fit that reel seat. Generally speaking, certain fly seats could have diameters sized more for 3-6 weights, while others could be 7-12 weights and so on.
Essentially, you can take the butt diameter of the fly rod blank, which most manufacturers list, and see if that will fit adequately within the I.D. of the fly seat.
Fly fishing obviously extends from freshwater to saltwater, so it’s another application where you need to make sure you’re choosing the right reel seat for the occasion. For example, taking a fly rod out to the flats will require an aluminum reel seat, or else the seat’s exposure to the salty environment will quickly take its toll.
Shop Reel Seats by Fishing Application
With so many different reel seats available for every different fishing application, it’s important to identify which model best suits you and your custom fishing rod.
Browsing reel seats by application is a great way to find the right option… and fast!
Arbors, Take Your Pick
For reel seat arbors, this question always comes up, what arbor is best?
The answer is, it really is just personal preference, so you decide!
No one specific arbor is stronger or more durable than the other, and the weight difference across the board is so marginal, it really isn’t worth the headache.
With that said, these are some popular arbor options in rod building:
Masking Tape Arbors
Simple, yet so effective, masking tape is an excellent arbor. It’s easy to apply and it centers the reel seat extremely well.
Tape won’t break down, but it also doesn’t bring any additional structural integrity. Like all arbors, tape is only used to center reel seat—it’s the epoxy that bonds the reel seat to the rod blank.
When in doubt, use masking tape arbors!
For heavy saltwater rods, try Fiberglass Mesh Tape instead—this mesh allows epoxy to penetrate even the tape arbors for a strong, durable bond.
Graphite & Polyurethane Arbors
These material arbors are awesome and installing them is easy. We recommend gluing these arbors into the reel seat first, then letting it cure before reaming and installing the reel seat into the handle assembly.
Just slow and steady on the reaming because these materials won’t take much work to fit into place.

Inserts and Accent Parts
For select exposed and skeleton style seats, you can customize them further with reel seat inserts, like the Carbon Fiber #CT by CRB.

These carbon fiber inserts are specifically designed to work with the CRB Premium exposed reel seats.
Size 15.0mm Fits CRB GEC2 Seats and GEC3 Seats.
Size 15.5mm Fits CRB EXS Seats and NTR Seats.
For more accent parts, like Winding Checks, click here!
CRB Comfort Palm Swell Spinning Reel Seat
Featuring an ergonomic palm support, the CRB Palm Swell Spinning Seat is molded for premium comfort and sturdy reel security that outlasts long hours on the water.

This spinning seat has two finish choices, a basic unfinished option, or a smooth comfort finish, which is excellent against all weather conditions. Plus, it includes your choice of a black, or stainless hood.
Comfort Finish/Soft Touch Palm Swell

This spinning seat has two finish choices, a basic unfinished option, or a smooth comfort finish, which is excellent against all weather conditions. Plus, it includes your choice of a black, or stainless hood.
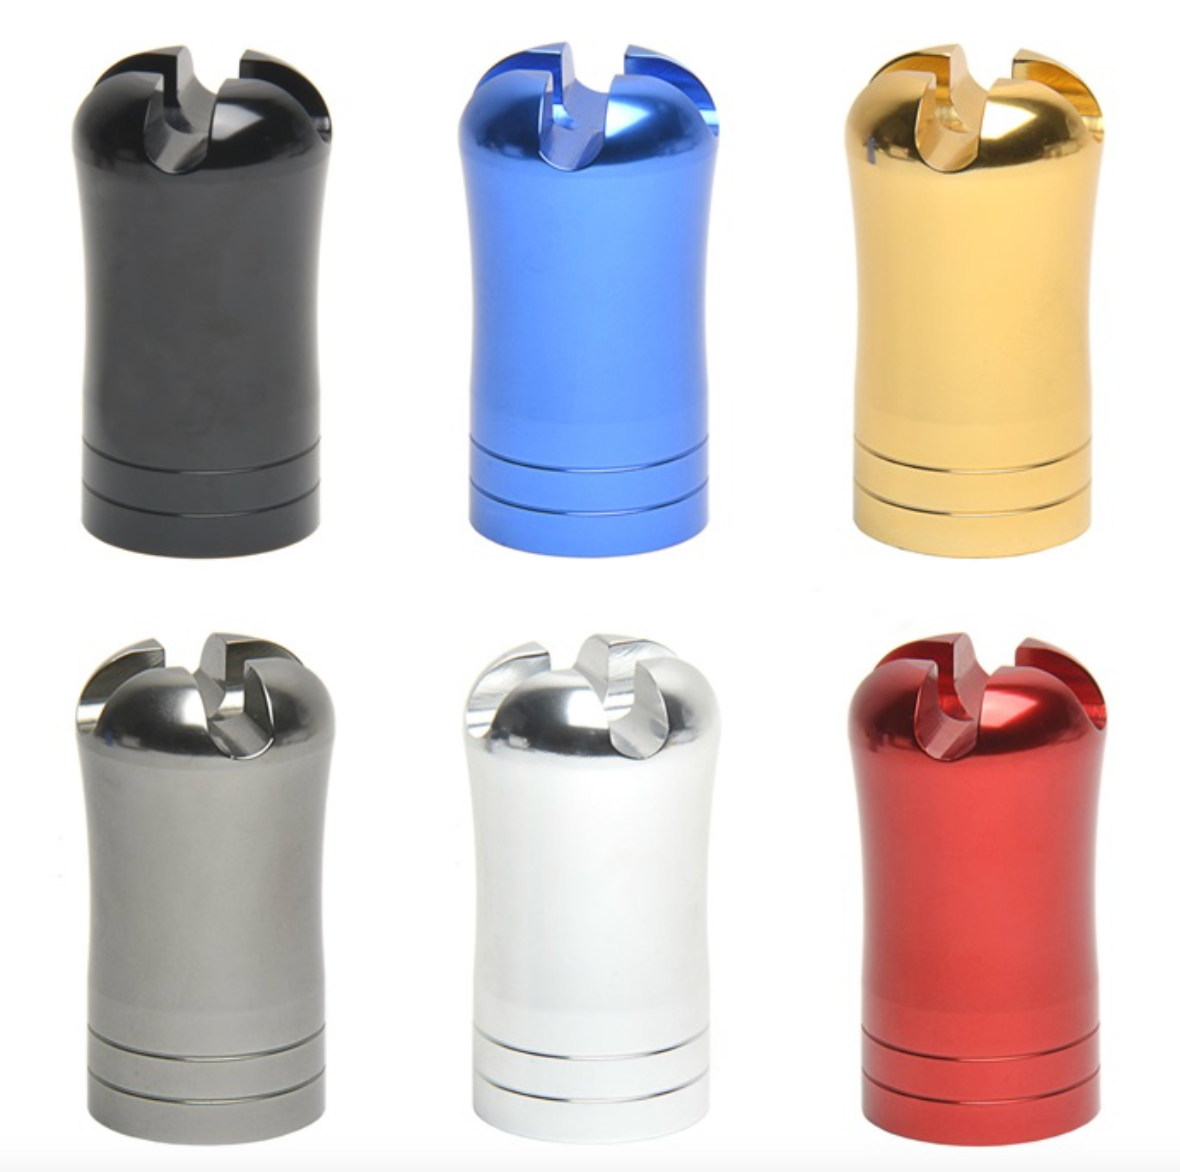
CRB Aluminum Comfort Lock Reel Seat ACLR
With a recessed hood and a defined channel to create the maximum security of the comfort lock system, this CRB Comfort Lock Aluminum Reel Seat features a very stable reel lock with an ergonomic shape designed to fit your palm.

Fast Facts:
- Available in 16-24 mm Diameters
- Aircraft Grade Aluminum
- Channel Design locks reels firmly in place eliminating wobble
- Available in 7 colors: Black, Black & Gold, Blue, Gold, Gunsmoke, Red and Silver
- Recessed-hood Design
CRB Aluminum Vented Reel Seat AVRS
Crafted from Aircraft-grade aluminum, these all-new reel seats from CRB feature CNC-machined vents and a Channel Lock design that secures your reel seat and prevents torqueing during a fish hook-up.

Available in 2 premium finishes and 4 insert options.
Fast Facts:
- Available in 18mm Profile, with 17mm Useable Diameter
- Aircraft Grade Aluminum, with CNC machined vents
- Channel Lock Design secures reel seat and prevents torqueing during a fish hook up
- Premium Dual Locking Nut Design with Nylon washer to prevent corrosion and binding
- Available in 2 premium Finishes and 4 Insert options
Grab a Matching Gimbal:
CRB Radiused Aluminum Gimbals AGR
This CRB Radiused Aluminum Gimbal is engineered with machined aluminum for the ultimate in toughness and durability on the open ocean, while it’s rounded, ball-shaped design helps with comfort and stability when putting it into your side and fighting fish without a belt.
Fast Facts:
- Available in 3 standard sizes
- Aircraft Grade Aluminum
- Available in 6 colors: Black, Blue, Gold, Gunsmoke, Red and Silver
- Radiused Design
CRB Tapered Aluminum Gimbals AGT
The CRB Tapered Aluminum Gimbal uses tough machined aluminum in a straight taper for a streamlined design that quickly transfers in and out of gunnels and belts, while maintaining maximum stability.

Whether floatlining with the smaller sizes, or using the larger sizes for standard trolling applications, you will enjoy the functional performance of this tapered gimbal.
Fast Facts:
- Available in 3 standard sizes
- Aircraft Grade Aluminum
- Available in 6 colors: Black, Blue, Gold, Gunsmoke, Red and Silver
- Tapered Design
4 Steps to Install a Reel Seat
Step 1: Arbor Up
Start by adding your arbor.
If you’re using tape, try to adding 3 different tape arbors equally spaced underneath the reel seat. As you add each arbor, dry fit the reel seat down over the arbors to make sure it’s snug.
For graphite or polyurethane arbors, glue it in the reel seat first. Once that bond has cured, carefully ream the arbor inside the reel seat until it fits the handle of the blank.
TIP: Always dry fit handle components first.
Step 2: Apply Epoxy
Next, take your ProPaste Epoxy and remove two equal scoops—one from the resin and one from the hardener. Mix these two together thoroughly and apply liberally in between and over top of the tape arbors.
For non-tape arbors, apply epoxy directly to the rod blank slightly above the final position of the reel seat.
TIP: Tape off the barrel threads of your reel seat before installation to protect them from epoxy.
Step 3: Install Seat
Then, slide the reel seat on over the arbors and rotate it 360 degrees into place. Rotating the reel seat into place will help spread epoxy and produce a stronger bond.
With non-tape arbors, simply slide the reel seat with the arbor glued inside down over the epoxy on the rod blank and rotate it into place.
Step 4: Clean Components
After you have installed your handle components, we recommend cleaning off any excess epoxy with Isopropyl alcohol.
Once the handle components are clean, remove the masking tape from the barrel threads and apply tape to hold components in place during the curing process.
As epoxy cures, it can expand, so taping handle assemblies together will help prevent any separation between parts.
Quick Tips Recap for Reel Seats
- Tape off the threads on the barrel before installation
- Glue graphite and polyurethane arbors in the seat first, then ream and apply
- Clean excess epoxy off with Isopropyl alcohol
- Hold curing components together with masking tape
DID YOU KNOW? It’s surprisingly easy to repair a loose reel seat, read more in our blog…