Make this awesome ultralight rod your next build for a minimalist fishing rod that is easy to assemble and super fun to fish!
Check out the episode we did back in March of 2020 to learn all about building your very own Ultralight Fishing Rod.
Mud Hole Live: Ultralight Builds
Panfish & Trout beware…Ultralights are easy to build and ultra-fun to fish!
From tips for age-old classic handles and modern minimalist setups, to exclusive custom tricks that anglers really love, it’s time we share all our advice on ultralight builds with you. As always, don’t miss our Live Q & A!
Featured Demos:
- How to Build Tennessee Spinning Handles
- Static Deflection Guide Spacing, Guide Foot Prep, & Guide Bands
- Step-by-Step SK2 Assembly with Tips & Tricks
Build the Best Minimalist Ultralight Rod
If you haven’t built your own custom rod yet, why not start with the most fun fishing rod you’ll ever use? This ultralight makes a 12” crappie feel like a lurching goliath grouper.
A large part of what makes this rod so great, the rod blank is really thin in diameter, yet strong in the parts that count for an unbelievable feel on the water.
When looking at MHX blanks in general, each series marries the most tactical lightweight structure possible with the durability and butt strength necessary to haul in fish.
For this specific Panfish blank, it only weighs 0.67 oz so the blank is practically weightless in your hand.
This instructional assumes you know the basics of rod building. If not, check it out here…
Step 1: Attach the Fighting Butt
The butt of the rod and the matching thread are the only real pops of color on this particular custom rod.
Here’s an array with the different color Winn butts with matching thread:

With plenty of butt end options, which color will help your rod really rock?
First, start by adding tape to rod blank in order to create an arbor that helps the fighting butt fit better.
You’ll have to make an arbor out of masking tape for the Winn Grip, then glue it up. Then, attach the butt to the rod with a two-part paste epoxy like ProPaste.

Once glued, slide the DAWC winding check down and use any leftover glue to secure it in place.
Step 2: Place the Winding Checks
To find what winding checks to use, we checked Mud Hole’s resources for winding check dimensions on MHX Blanks, you can find it here…

The first set goes in at 5.5”, then 7.5”, 8.5”, and finally 9.5”.
This means we need (4) 7mm winding checks.
Use the sizing provided for the rod blanks for optimal fit and performance.
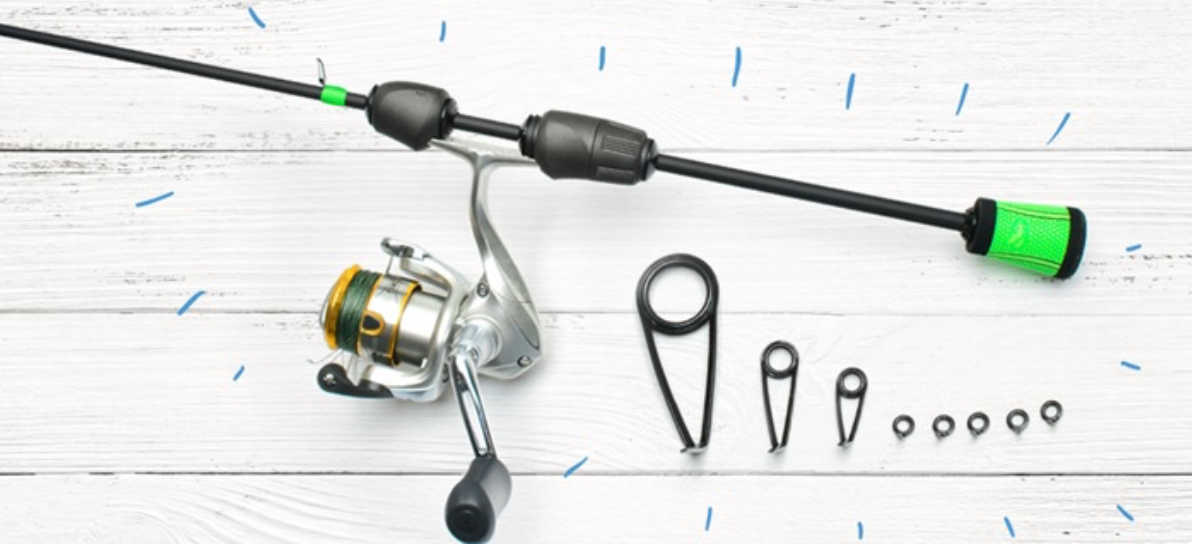
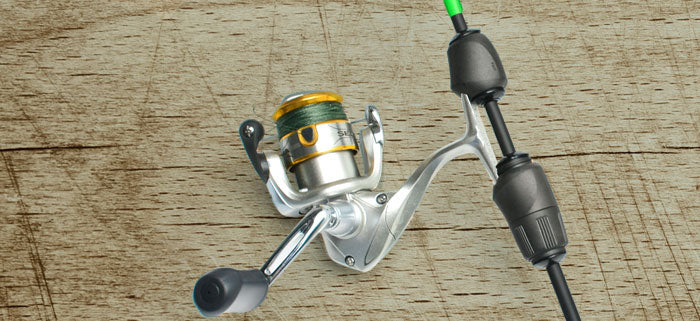
Step 3: Mount the Reel Seat
The SKSS16 reel seat should be centered at 8” from the end of the blank. This location is based solely on what looks and feels good so choose what works best for you.
The beauty of custom rod building, is that you can make these decisions based on what you like!

Make sure to space the reel seat sections 1” apart to hold your reel correctly.
Tape up the arbors, attach the seat, and check for yourself. This is where you can adjust it if you’d like a slightly different distance.
Once you’re satisfied, glue up your reel seat and move on to the next step.
Step 4: Install the Hook Keeper
Next, wrap the hook keeper on the opposite side of where my line would be running, about an inch above the reel seat.

The BHMK10W hinged hook keeper folds up or down, which is a pretty sweet plus on this ultralight rod.
Step 5: Space and Wrap on Guides
The Fuji K guides are great, but they can be confusing when it comes to figuring out the right sizes and spacing. But with a little help, it’s definitely worth learning about and using the K-guides.
To figure out what guides were needed, a customer service rep from Mud Hole helped determine my set up and get the right spacing.
This is the info that Mud Hole needed:
- Blank length: 5’6”
- Reel size: Size 1000 Shimano Sedona
With these specifications, Mud Hole suggested the Fuji 20H, 8H (The “H” stands for high), the 6M (“M” stands for medium), and five of the BLAG-5 Fuji running guides.
He also suggested putting the guides (largest stripper guide down to the last running guide) at this distance from the tip:
36” – 28.5” – 23” – 18.25” – 13.75” – 9.5” – 5.75” – 3”
Wrap those guides on with the neon green thread and then attach your tip top.

Finally, just finish the wraps with a two-part epoxy finish like ProKöte for crystal clear epoxy over your thread wraps.
Step 6: Let Epoxy Cure and Get to Fishing
Once everything is dry, you’re ready to hit the water.
This custom rod’s awesome feel and performance is super fun to fish with – so try it yourself!
Build Your Own Light Freshwater Rod
Rod building is a fun and rewarding way to build the best custom fishing rod for your fishing application. The minimalist ultralight rod above is a great example of all the benefits of custom rod building.
Whether you grew up catching crappie or spent your childhood fishing for blue gills, breams, and sunfish, remember just how fun it really is to catch ‘em!
Well bring back your favorite fishing memories and see your youthful smile return by building a panfish rod with the best options in rod blanks, reel seats, grips, and guides. These kits are designed around superior sensitivity and performance for ultralight and light power fishing applications.
Not only is fishing these rods a blast, the fish they catch are the best eating… YUM!