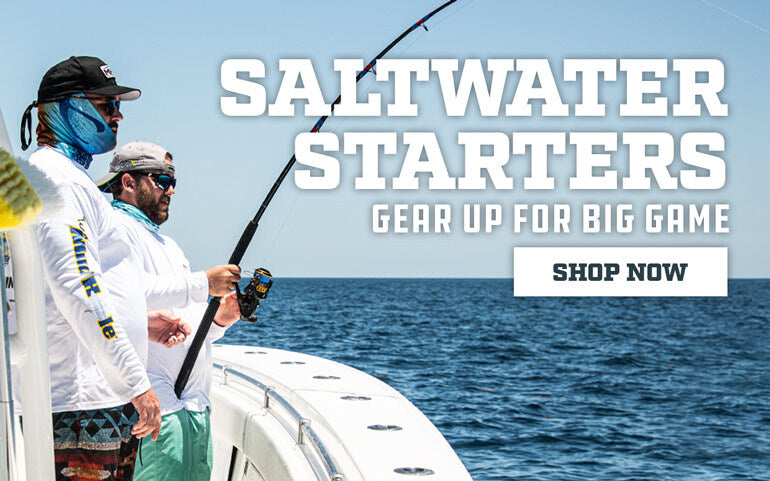
If you are an offshore angler dreaming of big tuna, we have a rod build for you.
The Offshore Fishing Rod You Have to Build
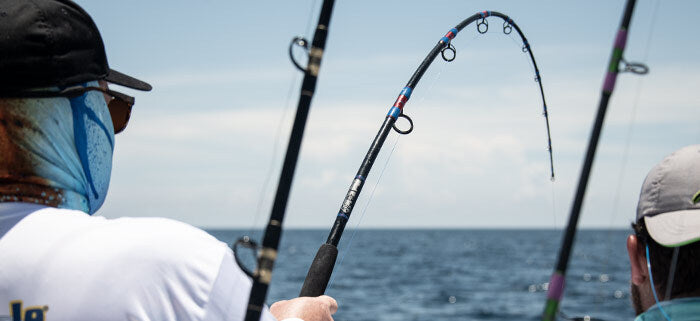
Offshore anglers are eager to get back to school… schools of tuna that is.
Whether you battle tuna standing up or from the fighting chair you can big the ideal custom rod for your application. That is a good place to start. We know we are chasing tuna. So now, How Big? How will you fish for them? How will you fight them? The answers to those questions will dial in your perfect rod.
Since tuna are a popular target that are a blast to fight and a true prize to catch, we’ve decided to dial in a trolling tuna rod as an example for the benefits of rod building.
Nothing beats the adrenaline rush of hearing that drag sing. Their speed and power can cause ringing in your ears. Knowing there’s a tuna headed to the horizon, you had better be confident in your gear. This moment happens in a flash, but the fight will take a bit longer.
From the initial eat and fierce fight to landing your prize gamefish and hoisting it up in victory, these moments create memories that will last a lifetime.
With these moments, there is always one constant… the perfect performance from your fishing rod.
With spring and summer just around the corner, it’s a great time to start building that offshore rod built to haul in these monsters. Pay attention, we have just the rod recipe to do it!
Trolling Tuna Rod Recipe Components
Here the component list to build your new favorite trolling rod:
Rod Blank: MHX Power Tip Offshore Rod Blank—PTSW66XXH
Handle: ATC Complete Aluminum Butt—AUB-2-BG
Foregrip: ATC EVA Grips Straight Tapered (12″ x 5/8″ ID)—ST-12-5/8
Winding Check: Black Vinyl Winding Checks—VWC-11/16
Guides: ATC Turbo Boat Guides—GZBTR
Tip Top: American Tackle Black Boat Top—BGSGT-10-12.0
Thread: ProWrap Nylon Thread—RN-D-325 & ProWrap Metallic Thread—MS-D-9120
Step 1: The Rod Blank
MHX PTSW66XXH Power Tip Offshore Rod Blank
- Length: 5’6”
- Line: 50-80 lb.
- Power: 2X Heavy
- Action: Fast
- Finish: Satin Black
When it comes to the rod blank, the choice of serious big game anglers is the MHX Power Tip Offshore Rod Blank. With its 2X heavy power, tubular structure and solid glass fast action tip, this offshore rod blank brings serious performance to deep-sea fishing.
Step 2: Add Tape Arbors & Mount Blank to Uni-Butt Ferrule
First, we need to add some small tape arbors on the butt end of the rod blank to fit inside the ferrule of the aluminum uni-butt. We use either masking tape or drywall mesh tape for our arbors.
![]()
Next, use an epoxy paste like ProPaste to bond the blank to the ferrule of the uni-butt.
![]()
TIP: Remove the ferrule from the uni-butt before installing the rod blank. To remove the ferrule, simply unscrew the top (collet) nut on the uni-butt and the ferrule will easily slide out.
Step 3: Screw Ferrule back onto Aluminum Uni-Butt
After the bond between the blank and the ferrule has fully cured, screw the ferrule back into the uni-butt.


Uni-butts are common components on offshore rods because uni-butts make switching out reels and handles easy, especially while out on the water. Since it is somewhat of a chore to remove a large trolling reel the uni-butt system makes it a breeze. Uni-butts are also used to extend the length of shorter offshore rod blanks up to 20 inches.
Step 4: Install the Foregrip onto the Rod Blank
Next, add some epoxy paste and slide the foregrip down to meet the edge of the uni-butt. We recommend Pro Paste Brand Epoxy.
![]()
Step 5: Wrap Guides on with Thread
Once you have the guides properly spaced and aligned, attach each one with rod winding thread along the rod blank. We recommend Pro Wrap brand thread.
The Custom Metallic Underwrap Effect
One of the most popular ways to use metallic thread on an offshore build is an underwrap. Underwraps provide an extra pop of color to a guide wrap, but when wrapped over with nylon, you can make an incredible custom thread wrap. Not only does the underwrap help protect the blank from the pressures of the guide feet, now it adds a decorative touch.

Since nylon becomes translucent without a color preserver, you can use metallic thread as an underwrap and then wrap nylon over it. This creates an amazing shimmer effect that looks incredible in sunlight.
Get your thread from the best and buy ProWrap rod winding thread!
Step 6: Finish Wraps with Epoxy
Once your wraps are done, it is time for the finish. Chuck your rod up in a rod dryer, and begin mixing up your epoxy. A two-part epoxy like ProKöte is a great choice because it is the clearest option when it cures and has an excellent working time.
Finally when the epoxy is mixed clear, apply it over each wrap as the rod spins and then leave it to cure for a full 24 hours.
TIP: Slowly mix the two-part epoxy together rather than whisking it at a fast pace as this can add unwanted bubbles.
Add a Custom Decal
Nothing adds a personal touch nice a custom decal. If you build a custom fishing rod to target a species like tuna, why not add a Tuna decal for the perfect custom look!

We have tons of fish options. Check out these awesome Gamefish decals to match the rod you’re building…

Now is the time to start building your new favorite trolling rod!