Learn how to make your own DIY Carbon Fiber grips, so your new fishing handle is both comfortable and completely custom!
6 Steps to Shape CFX Carbon Fiber Grips
Ultra-lightweight, yet firm and packed with vibration enhancing performance, carbon fiber fishing grips have become an innovative option for custom handles.
Known for its feather-light feel, carbon fiber grips bring serious comfort and performance to your custom fishing rods. Plus, shaping the grip’s core and applying the carbon fiber sleeve is an easy upgrade you can complete in no time.

Watch Demo for DIY Carbon Fiber Fishing Grips
Here is a recap of Mud Hole Live with a tutorial for shaping and building your own custom carbon fiber fishing grips.
The Tools and Supplies:
- 3/8” Mandrel
- RBS-Pro, Lathe, or Drill
- Box Cutter
- Mandrel Wax
- RDS Rod Dryer
- Sand Paper
- CFX Vibra Core
- CFX Carbon Sleeve
- Laminating Epoxy
- Sleeve (Hose) Clamps
- Disposable Gloves
Luckily, the CFX Custom Carbon Fiber Grip Kit already includes: Vibra Core, Carbon Sleeve, laminating epoxy, and sleeve clamps.
Use the following steps to build your own carbon fiber grips… AND don’t forget to catch the video tutorial at the bottom!
Step 1: Mount Vibra Core on Mandrel

Start by prepping the mandrel with some mandrel wax and then sliding the Vibra Core onto the center of the mandrel.

Next, size the core to your desired grip length and mark the Vibra Core where you will soon cut.

Note: Avoid inhaling dust from CFX Vibra Core with adequate ventilation and face protection.

Turn on the power, and let it spin!

To cut the core to your desired length, slowly introduce a box cutter to the core as it spins on your lathe or rod dryer.
Gradually applying the razor or sharp edge to cut the core without touching the mandrel.
Tip: You can also use sanding paper folded over once or twice to create a firm edge that will easily cut through the Vibra Core.

If cut into smaller lengths, the core won’t grip the 3/8” mandrel as well so add a couple tape wraps to the arbor the mandrel and snuggly fit the core.
Step 2: Shape Core to Your Liking
With the Vibra Core secure on the mandrel, fold the sand paper in half 3-4 times or until you have created a firm corner.
Note: It takes less pressure to shape these cores than it does cork, so temper sanding accordingly.
Use this firm corner to take off more material and form the grip.

Working the corner back and forth in area you want to remove material, you can form a taper or shape a full wells, half wells, or well, just about any grip you want!
Tip: If you don’t have the RBS-Pro, or a lathe to turn grips, just use your handy power drill and an RDS Stand – See below.

Then, follow up with a single sheet of sandpaper to smooth out the surface of the core.
Step 3: Apply Epoxy Layer to Core

Next, arbor up the mandrel to fit in the RDS Rod Dryer and mix up the laminating epoxy.
 Tip: Use the syringes included in the CFX Custom Carbon Fiber Grip Kit to accurately measure the 5:1 ratio of Resin to Hardener.
Then, just stir the mixture until clear!

With the core rotating in the dryer, begin adding a generous layer of epoxy to the outside surface of the Vibra Core.

Don’t forget to add some to the sides for a sleek edge on the finished grip.
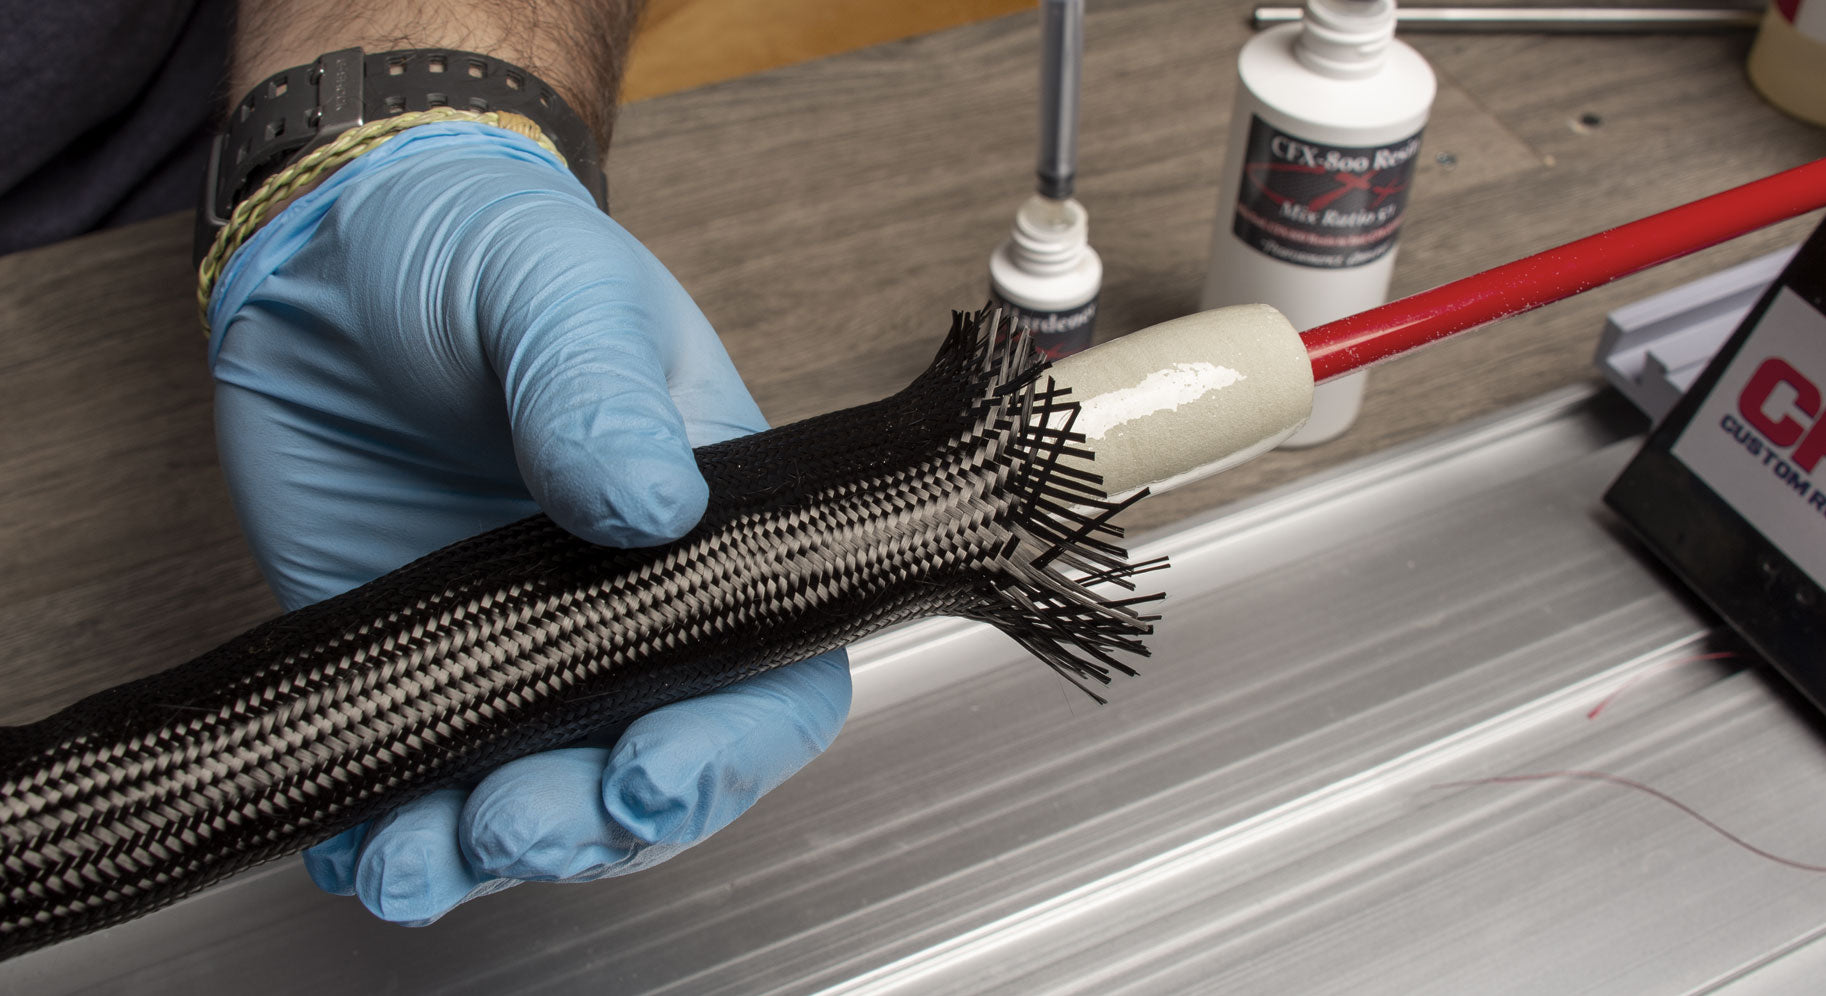
Step 4: Position Carbon Fiber Over Core
Trim carbon fiber sleeve to be 2-3 inches longer than the core on each side. This helps give you some wiggle room in case of any errors.

As you become more experienced, you can use less of the sleeve to save more material for other grips.

Since some epoxy will penetrate the carbon fiber, use latex or nitril gloves before fitting the carbon sleeve to the core.

With the sleeve sized to fit, loosen it up to slide over the core.

The sleeve behaves a lot like a finger trap, so slowly push the two ends together and the diameter of the carbon sleeve will increase to fit over the vibra core.

Step 5: Smooth Out Carbon Fiber and Lock Clamps
For this step, stand the mandrel and core up vertically. Then, slide the sleeve down over the core with a few excess inches over each edge.
Start from the center and smooth out the carbon fiber sleeve over the core.

This will tighten the sleeve over the core to ensure a smooth, snug fit.
Once you’ve worked towards the edge, spin the mandrel and compress the carbon sleeve flush over the grip’s edge.

With the sleeve over the grip, add a hose clamp to each side to further tighten the carbon fibers over the grip.

Step 6: Cure and Install Your Carbon Fiber Grips
The grip doesn’t need to rotate to finish, but keep it elevated for the best results.

Leave the carbon fiber grip to cure for a few hours and then you can just trim off excess carbon fiber.


Then, just ream and install your new custom DIY Carbon Fiber Grip on your fishing rod!
