Fixing a cracked ferrule is not only possible, it’s also rather straightforward. Regardless of the cause, a cracked ferrule can be fixed with the following steps so you can get back to fishing in no time.
How to Fix Broken Ferrules on Multi-Piece Fishing Rods
Although wrapping ferrules with winding thread helps reinforce its hoop strength, ferrule wraps alone cannot prevent a ferrule from cracking when the segments slide apart while casting, if the multi-piece blank is stepped on, or even crushed in a car door.
Depending on the severity of the damage, most ferrules can be repaired to restore both the rod blank’s integrity and performance.
Follow these 6 steps to repair your damaged ferrules:
1. Assess the Ferrule’s Damage
Once the ferrule is cracked, inspect the damage to determine if this method will be able to restore your broken rod blank. Unfortunately, when the damage extends beyond half an inch, this broken blank cannot be salvaged.
For example, the picture below shows a crack that runs too far up the blank’s ferrule to fix.

Fixing a section like this will only result in rod failure next time you’re out on the water.
However, if the ferrule’s damage appears minimal like the crack in the following picture, then it can be fixed and returned to fishing without any further worry.

Since this crack runs less than half an inch up the ferrule, the ferrule can be trimmed down just past the damage without harming the original action or power of the overall rod blank.
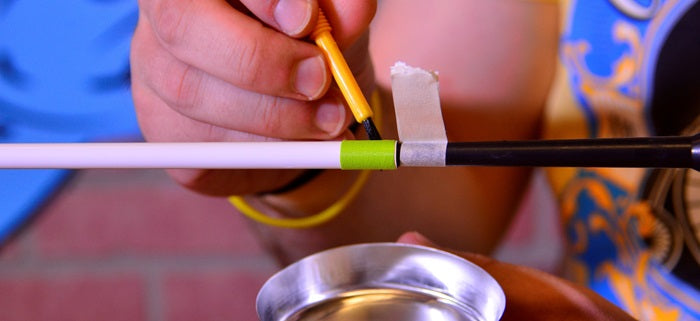
2. Mark and Center Tape Over the Cutting Point
When the damaged ferrule can be repaired, the next step is to tape over the blank where you will cut off the broken portion of the rod blank. The tape protects the blank and keeps it from splintering once it comes time to cut it.

In addition to taping over the blank, marking the cutting point on the tape allows you to align the dremel tool’s blade on the blank and make a straight, centered cut through the ferrule.
3. Remove Broken Portion of Rod Blank
With the tape marked and centered just above the cracked ferrule, it’s time to remove the broken portion.
![]()
For the best results, slowly yet firmly introduce the dremel’s blade to the mark until you have cut completely through the rod blank.
Keeping a consistent pressure as you cut through the blank ensures the remaining edge will be smooth and precise, without creating any further damage.

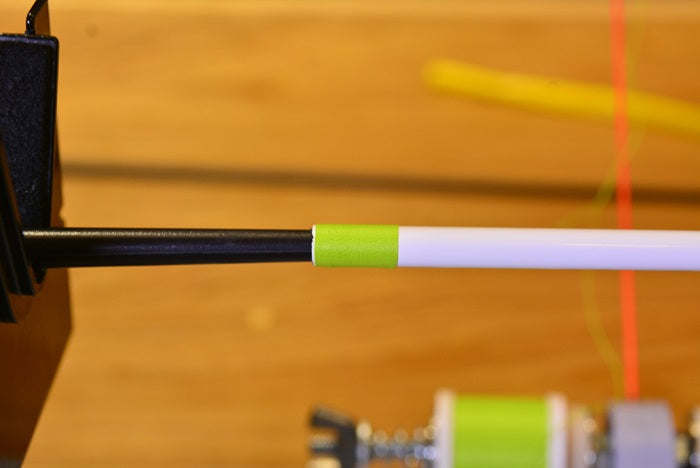
4. Take off Tape and Inspect New Ferrule
After cutting off the damaged portion of the ferrule, remove the tape and inspect the new ferrule’s edge.
By using the marked tape, you will easily cut the blank with precision, while still protecting it from splinters and further cracks. Once the tape is removed, you will have the remaining ferrule with a perfect flat and smooth edge.
5. Re-Wrap the Ferrule with Winding Thread
As previously mentioned at the top, ferrule wraps are crucial to increase and reinforce the hoop strength of the ferrule.
Since the ferrules are the connection points between each segment of the rod blank, wrapping each one with winding thread bolsters the ferrule and your confidence. Now that the damaged portion is removed, begin re-wrapping the ferrule.
In this step, a burnishing tool is necessary because it helps move the wrap to the edge of the ferrule for maximum protection and a professional aesthetic finish.

Although there is no specified length for ferrule wraps, the general rule of thumb is actually to use your thumb. Generally, the width of your thumb is an adequate length for your ferrule wraps.
6. Apply Epoxy Finish to Re-Wrapped Ferrule
With the thread wrap secured at the edge of the ferrule, you can now apply ProKote to finish the wrap with a crystal-clear epoxy you can trust.
ProKote is an excellent epoxy for thread wraps because it’s an epoxy finish created by rod builders for rod builders, and not to mention it’s clarity is incredibly impressive.
Using the CRB Rod Dryer to spin the rod blank, apply the finish to the ferrule wrap and allow for a full 24 hours to cure. Waiting the full 24 hours before fishing ensures you don’t get on the water with a faulty finish that will result in rod failure.

Once the epoxy cures, you and your repaired ferrule can get back to catching fish!
For more on ferrules, read our blog: 5 Tips to Improve Ferrule Wraps…
Mud Hole’s Rod Building Resources
In addition to dedicating a page for Rod Repair, Mud Hole has plenty of resources to offer all rod builders and anglers alike. From our experienced staff to our unbelievable inventory of products to match, we are your one stop shop for all things rod building, so shop Mud Hole today!